How to Schedule Leave
- Select the applicable day/s that are required to schedule the absence/attendance, this can be done by selecting the day or by clicking and dragging the curser where multiple days are required
- Right click on the applicable days, these should now be highlighted, and select Create absence / attendance
- Select the appropriate absence/attendance type
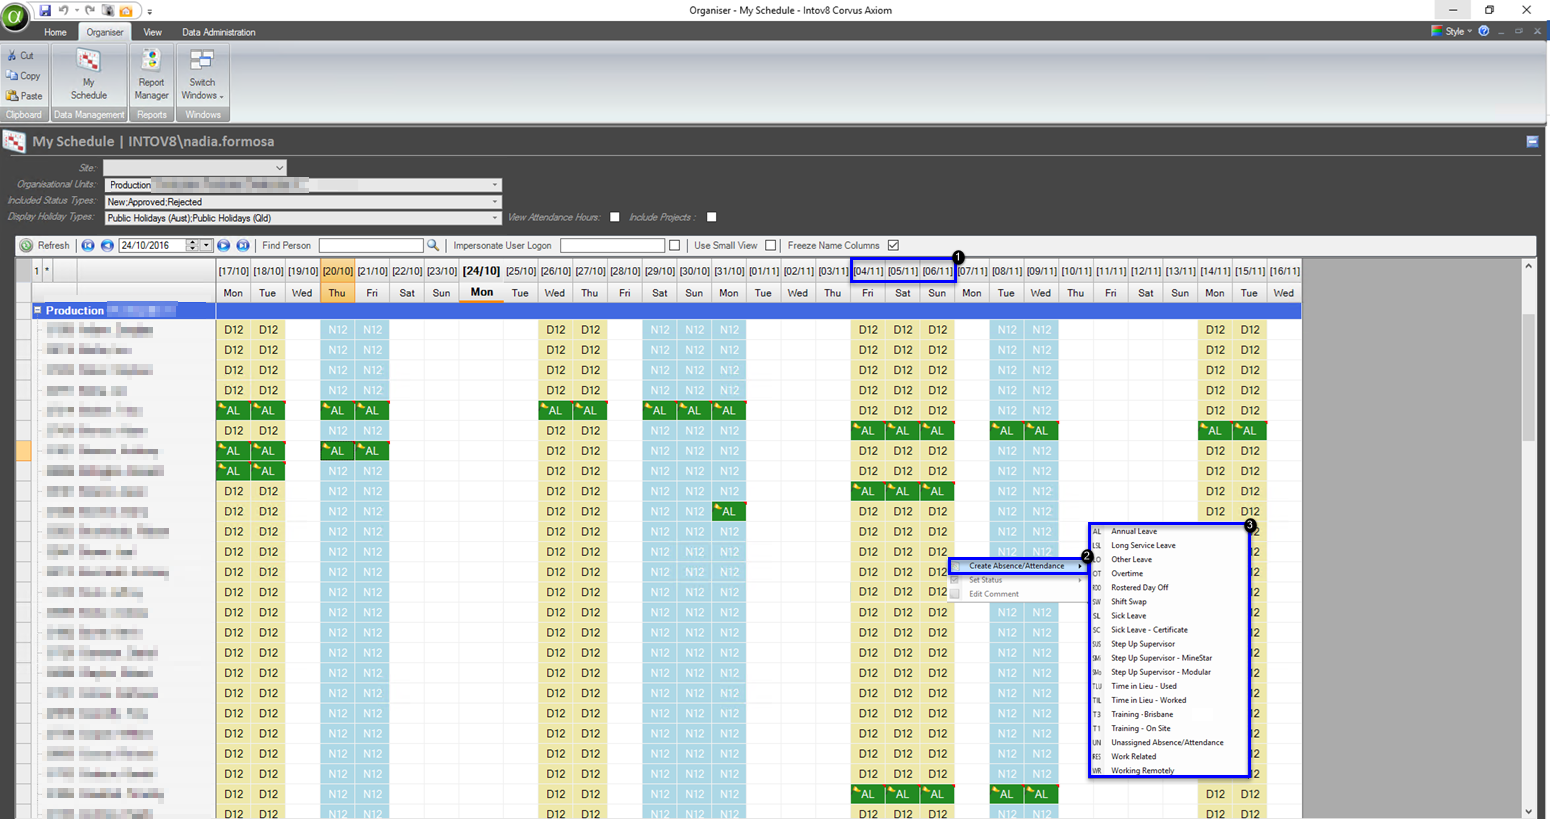
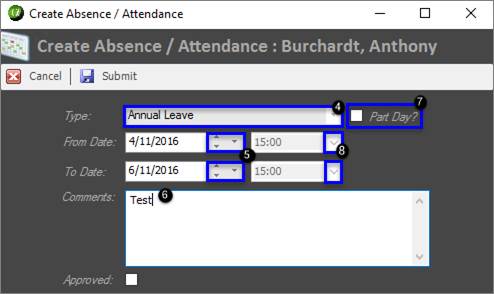
This drop down menu can be used to modify the Leave Type
Use the arrows to skip forward or backward by day, or the drop down
calendar option to select a dateThe Comments option can be used to provide further information
regarding the leave type, e.g. First Aid Training AttendanceThis tick box can be used to represent a Part Day absence/attendance
If Part Day is selected, use the drop down menu to provide the
applicable time of leave
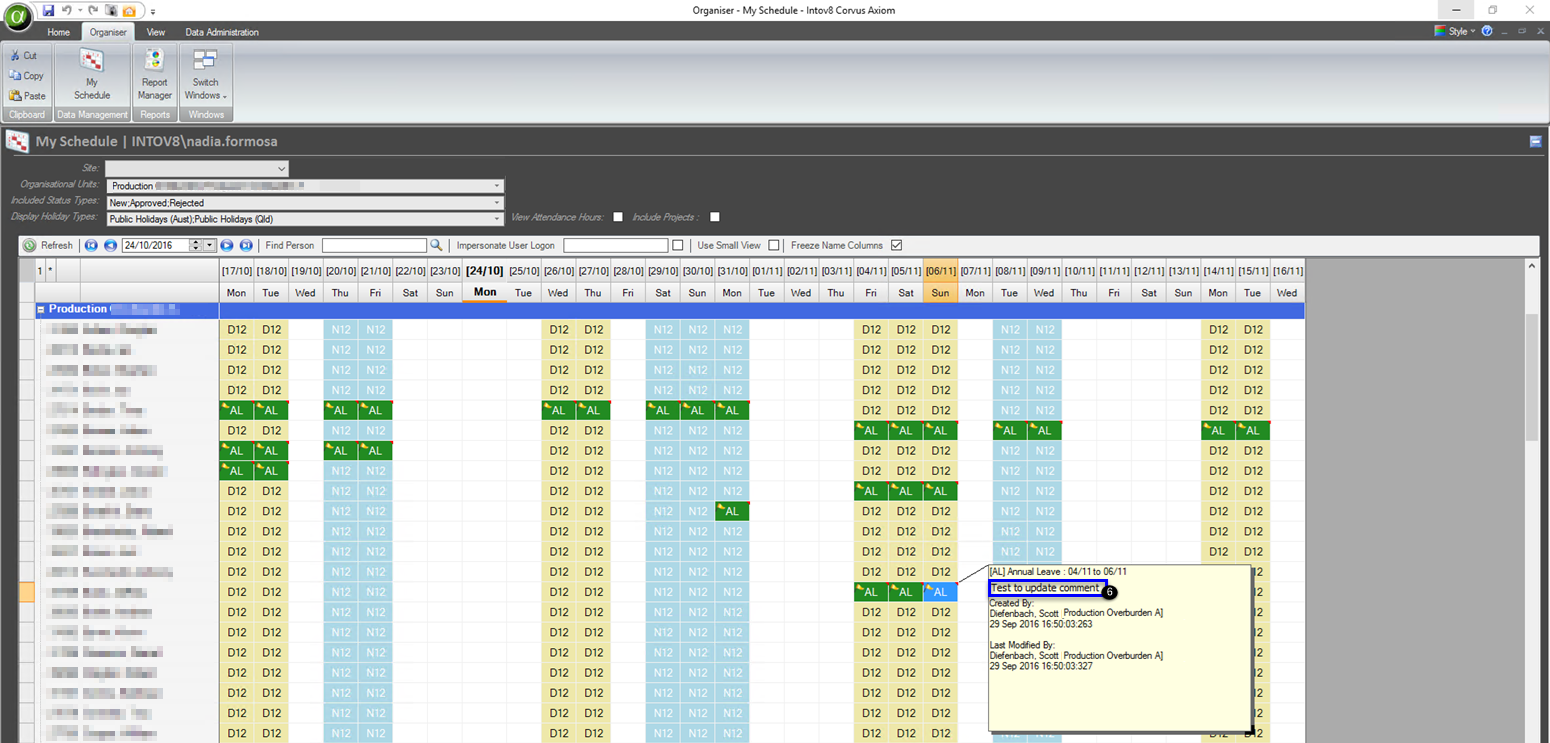
Once an absence/attendance has been submitted, a yellow flag will display on each scheduled absence/attendance day/s (as above). This means that while the leave has been submitted, it is yet to be approved. The flag will change colour or disappear as the absence/attendance status changes.

Change Leave Status
- Select (by right clicking) at least one of the leave dates
- Select the Set Status option to make the appropriate changes
- Select the applicable status type

View or Edit Leave Comments
Reasons for an absence/attendance, if entered when submitting the request, will be displayed in the Comments box.
To view the absence/attendance comments
- Hover over the applicable submission
- The comments will display as follows
To edit absence/attendance comments
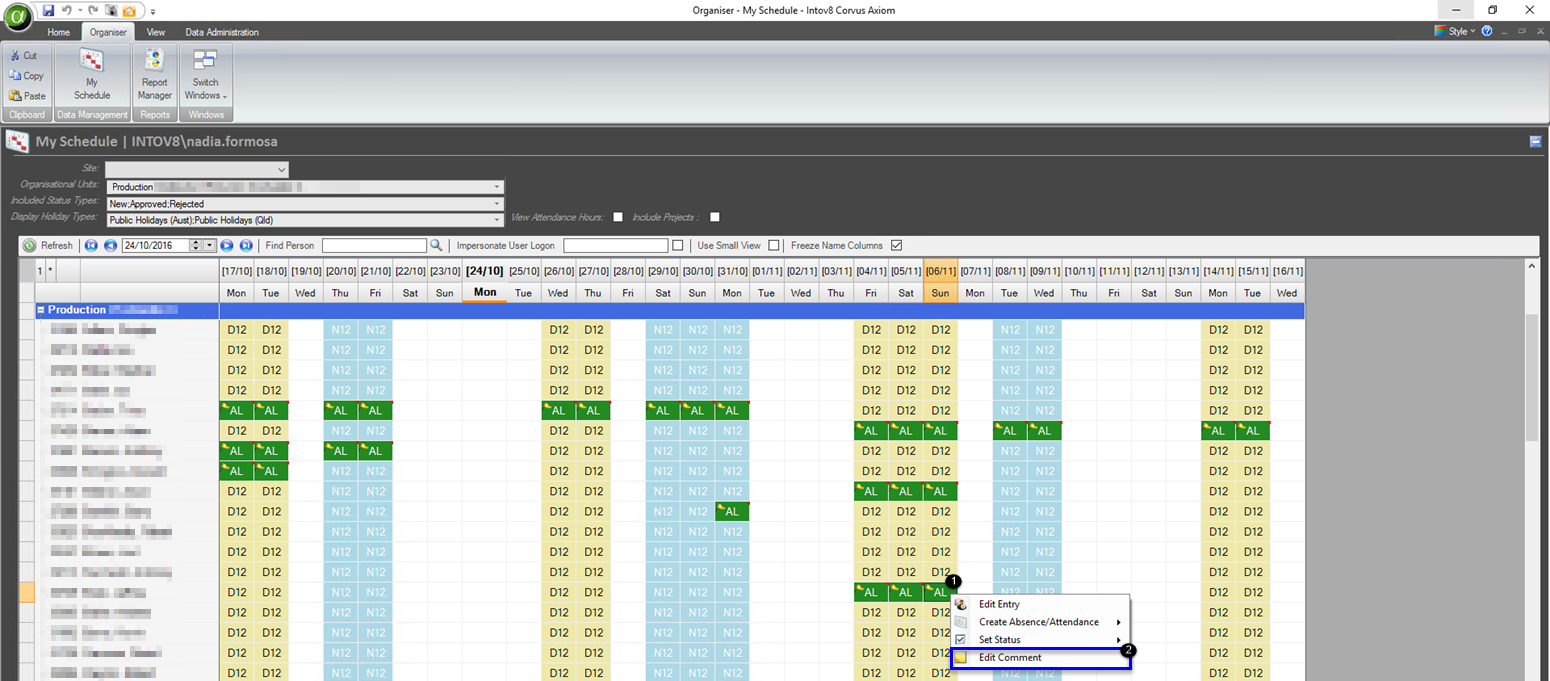
- Select (by right clicking) at least one of the leave dates
- Select the Edit Comments Option to make the appropriate changes
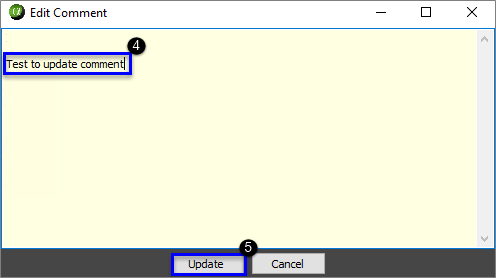
- The following information box will appear

Update the text as required
Select Update from the information box
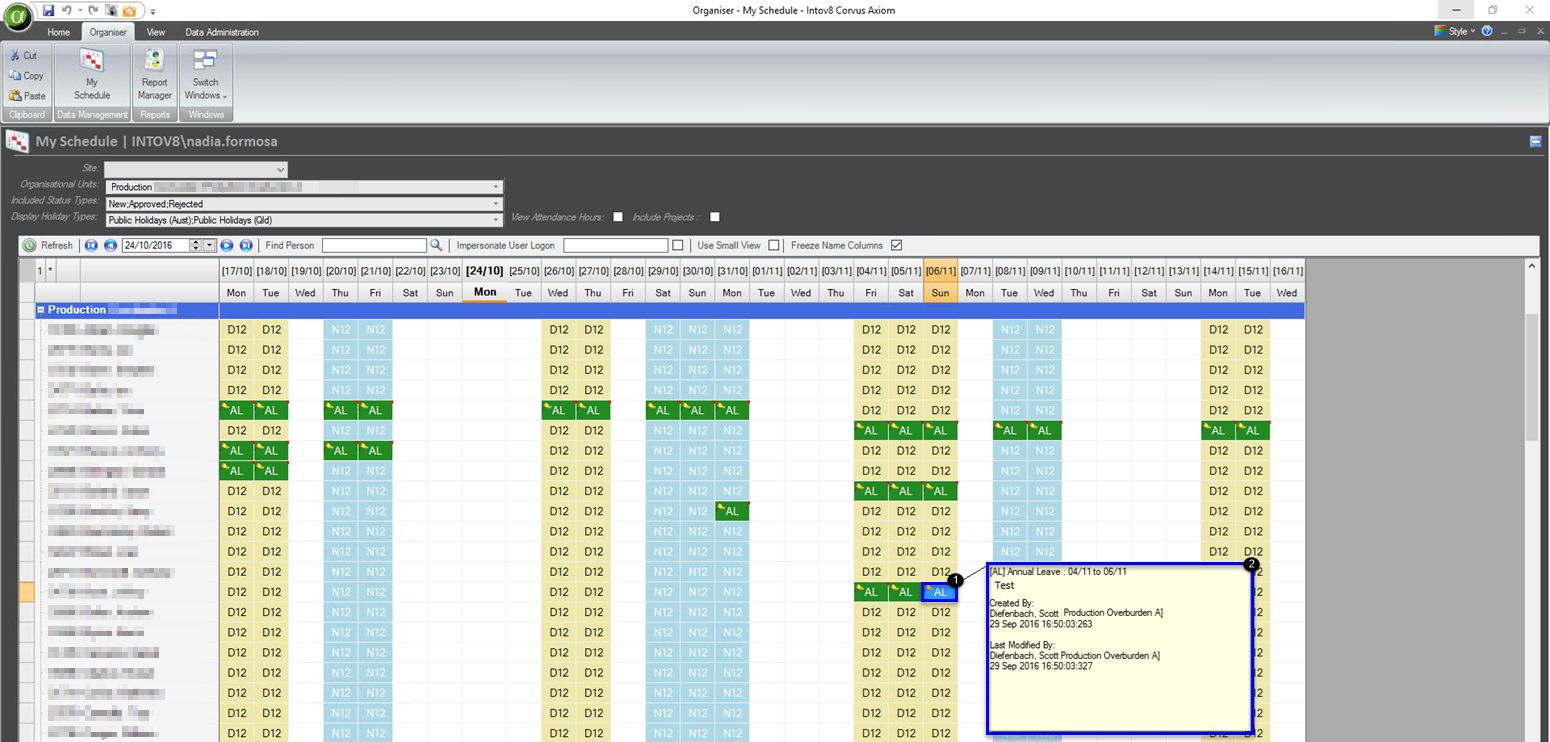
- Comments box should now be updated as follows